Friday, 27 March 2015

Mail call

After much delay, they are finally here!  The Farish 4F 0-6-0 all purpose do anything loco.  I've been a bit selfish and have four, including one spilt form a box set.  You can read the numerous reviews in the mags and blogs, and I agree it is the best so far in RTR steam locos, even better than the recently released Farish Duchess (and I've got two of them)!
- Team Fowler shunt team
Why so many, so ask?  Because there was so many, 574 built between 1924-41!  The S&DJR had more than few and were often seen double heading with another 4F, a 2P, a BoB, or a black/Std 5 to name a few.  I've only run one of them so far, only because I got it back in January from the box split.  Haulage wise, it can manage 20 or so wagons or 4-6 coaches, which is more than enough for my requirements. The other three, which arrived today will have to wait as my 5yo son is have a sleep over tonite and we are making pizza and watching Star Wars and sleeping in the tent in the backyard this evening!
 
- lots of included detail 

Tuesday, 17 March 2015

Sturminster Newton - Landscaping - part 4

Just a quick update.  Got lights, comprising:

  • 25mm PVC pipe with T-pieces and 90° angle elbows,
  • 4m of LED strip and associated powerpack, and
  • Trial and error.
All need to do now is tidy it up, add some connectors, paint and make it ease of use for transport.
- view from Butts pond.


Sunday, 15 March 2015

Sturminster Newton - Landscaping - part 3


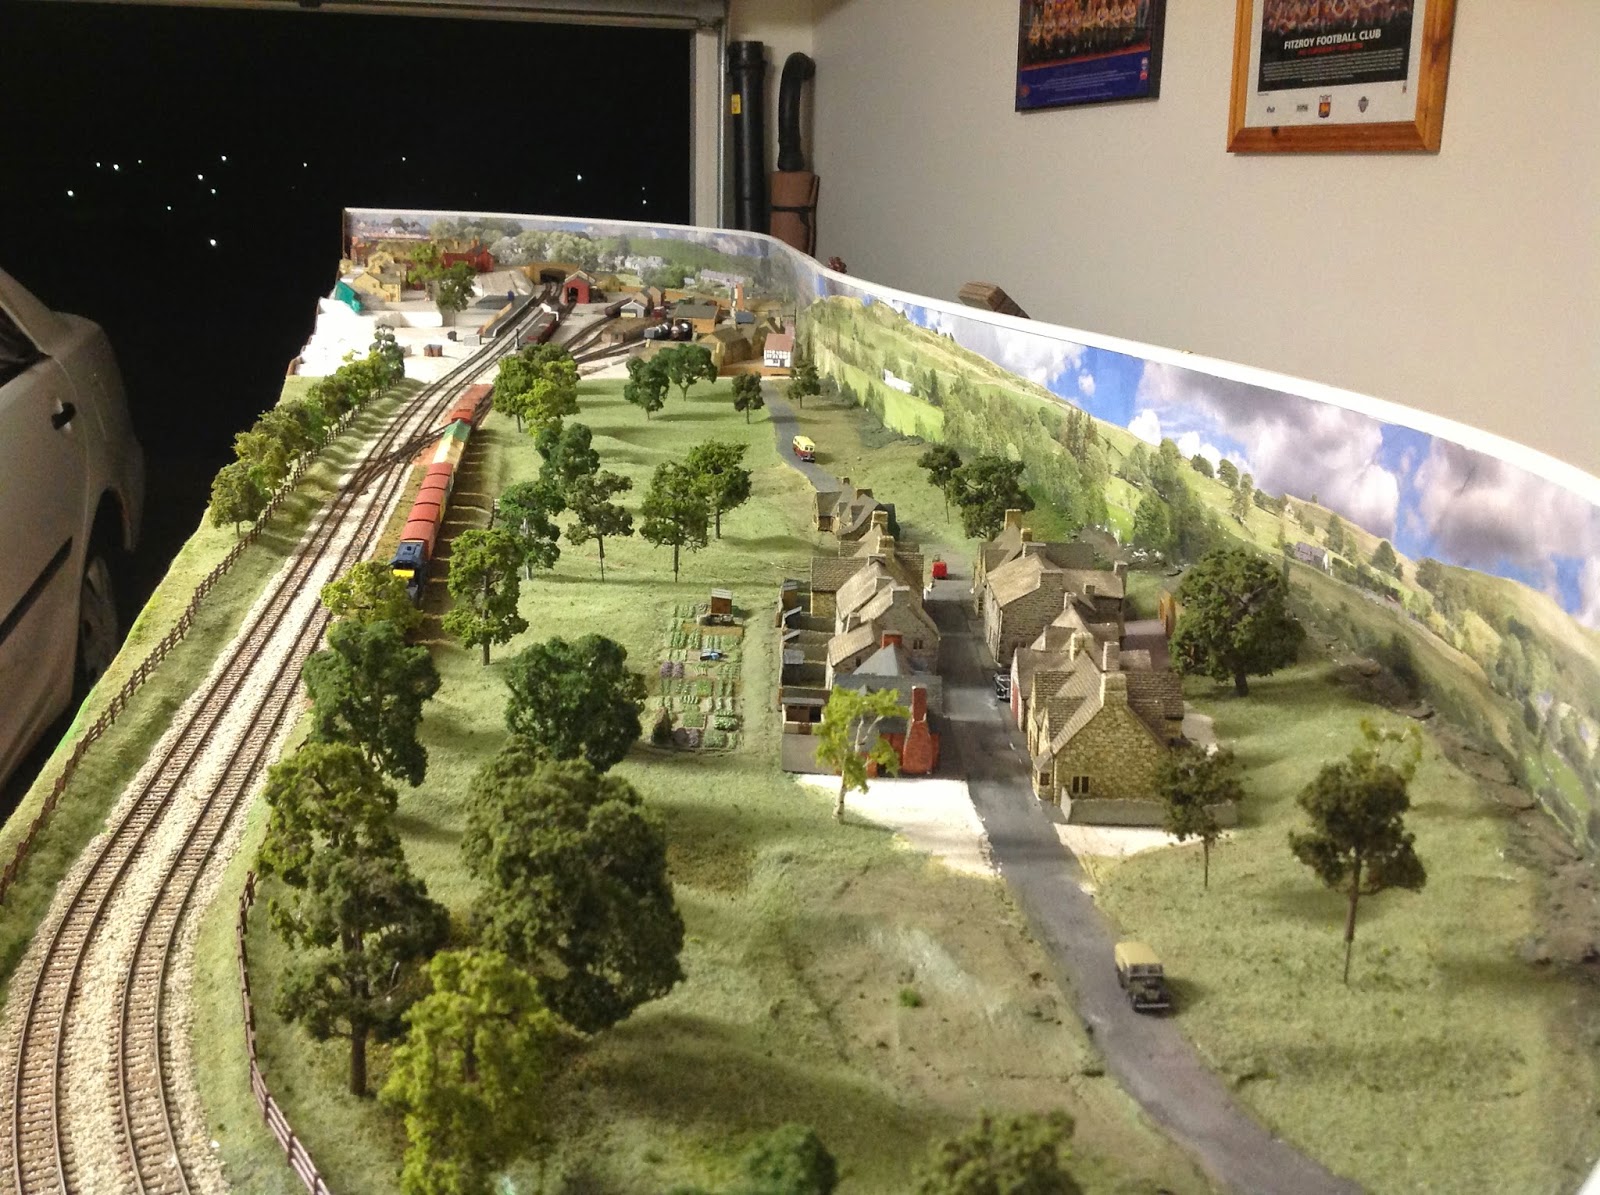
A bit late with this post, but work is continuing, and it is occurring both above and below the baseboards!  The work on the village scene moved ahead with the siting of the buildings (finally), and laying down of the road and the associated boxing and applying of the cobblestone roller.
 - Buildings and roads in place
- Road into station forecourt.
On the building side, I’ve use some old SD mouldings plaster cast buildings I had lying around.  They fit the scene and resemble the building that were found in the area.  I’ve use 1 ready to plonk Hornby Lyddle End building, which will serve as the post office, a scratch built card shop building and also a Severn models etch-brass shop kit. 
 - shop in progress
 - finished and ready for painting
- 50% good, but blue acrylic didn't quite work, so strip and start again.
This was a Kickstarter project from last year which got-up.  They are quite simple to build and the detail is great.  I’ve also built the stables which I intend to use within the station yard complex. 
- completed stable
I’m still pondering as to what the shops will be, but research has indicated a bike shop, butcher, drapery and general merchandise stores where at that end of town.
The paving was painstaking!  After laying the timber boxing and getting it level, I picked a nice 33°C day to lay the clay.  I did it in small sections, on a diluted PVA base to give it some adhesion.  I’m still a bit concerned how it will withstand movement. 
 - 1st section
 - drying and cracking commence
 - a village appears.
Time will tell, and the guys have tentatively booked me into the Toowoomba show at the end of May; that is a round trip journey of 145km.  As the clay dried I kept spraying with a small mist bottle and using a damp finger or paint brush filled in some of the minor cracks.  I learnt early on that to properly use the cobblestone roller that use must let the clay being to dry.  Rolling it too early, while still damp, cause the roller to slip and spin and the area turning into off-road adventure park.  Once finally dry, I applied some grey paint, in this case Tamiya grey texture paint, which gives the rougher surface.  The roads are not perfect, but what road would be in Dorset during the 1930-50’s?
On a past Turs UFO night the question of lighting was discussed.  This lead to the use of LED strips.  A quick visit to eBay and 5m of lights were purchased with associated electrical connections, all for a very reasonable price.  They arrived with a week and we had a play with them on the Thurs just past.  I now need to assemble some 25mm PVC pipe to mount them in.
- 5m roll of LEDs.
And then we went under the baseboard!  Uncouplers!  Homemade electromagnets, using Peco uncoupler arms.  So far I’ve made 12, and installed 6, and will most likely require at least another dozen.  With current deadline in mind, Peco will have to suffice, but it does limit what I can and can’ shunt.  Our group meeting on sat we were discussing DG’s, so will need to follow that up some more.
- 10 down, how many to go?


Wednesday, 4 March 2015

Sturminster Newton - Landscaping - part 2


It’s been a fairly productive this week, I think.  The signal box development continued, but came to a standstill when I couldn’t find some steps I had tucked away.  I’ve since ordered some more and they are winging their way from Ol’Blighty as you read this.  No doubt the original will appear about 5mins before the postie arrives with the new ones!
I commenced playing with the cobblestone roller I acquired from Shapeways.  It has been a series of trial and error. Development was as follows:
1.       Roll DAS clay onto MDF base with a thin strip of PVA.  This was rolled fairly thin, 2-3mm thick.  This was then allowed to dry.  The results were not good, cracking.
After having spent some time concreting, for the next two efforts I used some boxing. 
2.       This was rolled clay, which was set between to wooden formers (Star Bucks coffee stirrers, approx. 5-7mm high).  No glue this time, which resulted in the bowing once the clay dried.
3.       Again using formers, but some 2mm craft strips (model ship building).  Again no glue, but less bowing.  Both attempts had some shrinkage.
Some talking with the Thursday night UFO mob suggested that the surface be sealed to prevent the moisture from the clay being absorbed.
4.       Sealed surface (undercoat and gloss finish), 2mm formers and PVA to hold the clay.  This is the best result so far, I even painted it.  Just need to measure the spacing of the formers to prevent the roller slipping and varying the height.
 - Test results, L-R, 1-4
 
- close-up of tests 3 and 4 and the roller itself.
 

While this was going on the landscaping continued.  The plastering continued and then the static grass application began.  I’ve only got a home-made one, but it does the job.  I’ve only zapped myself once, so far!
- looking towards the station .

- looking from Stur.
I also managed to finally secure the station platform to the base board, after only 4 years.  This required some test adjustment, as the new Farish Duchess would not clear it.  I had to go digging around my many boxes of stuff, the horde, to find all my supplies of flock, static grass, and other scenic material.  It’s amazing what you have acquire and forget about.  The only thing I’ve had to buy this week was some bolts to secure the village baseboard.  Was most pleased with the rose hedges I picked up somewhere.

- Roses will need some pruning.

Wednesday, 25 February 2015

Sturminster Newton - Landscaping and Signal Box -part 3


Well I’m back from concreting and shed building, and now the developers are hard at work over the road dropping trees, inspiring!
- tree demolition.
I started the week by tackling the front of the layout.  I’ve been pondering the final design for here since, forever!  As much as I wanted to plonk a church there, the nearest one was over 5 miles to the north. All my references said there was nothing there except for trees and open ground and this includes the RAF aerial photos in 1947.  So why fight it.
- area to the south of the station, which will be the front edge of the layout.
With a slight bending of the station road, a small portion of the Sturminster Newton village will appear in the front left-hand corner of the layout.  I will admit that I will cheat here and use some ready-to-plonk buildings; a mixture of some SD moulding plaster cast and Hornby Lyddle End.
A bit of foam shaping and it was time to apply some plaster bandage.  I started with some 6” wide bandage that Mrs Neb found at the local $2 shop.  This went on reasonably well.  Once this roll was finished, I then started a new roll of 4” bandage, which I “acquired” during one of Mrs Nebs recent hospital visits.  This stuff was great, the plaster was really smooth and spread quite easily. 
- plaster bandage drying.
 This dried within 4 hours and so I was able to put some base coat down before I attacked the area with some static grass. From here I moved onto the station road area.  I shaped some 3mm ply to fit the area, including going over the bridge and down into the goods yard entry and round the milk factory.  I’ve use ply, as I want to give some ridged support to the area, in particular using DAS clay as cobble stones from a roller I found on Shapeways.  This still needs some further testing to get it to work.
- Sturminster village in top left hand corner.
I also managed to get some more work done on the signal box.  I’ve put all 4 side together, and its almost square.  Now I working on the balcony.
- balcony components.

Monday, 16 February 2015

Sturminster Newton - Signal box - part 2


Just a quick update, as I’m away for the remainder of the week doing some real building.  As mentioned earlier, some further colour photos were discovered, buried within my laptop, which showed some additional doors, which turned out to be painted green. 
- one of the few colours photos showing the access doors under the signal box. 
They don’t appear to be normal doors, just some made up of weather boards, so a fix was required.  This actually took two attempts, as after I had made the first set of doors to access the levers and cables, I inadvertently glued them to wrong piece of pasticard.  Not a major disaster, but just another lesson in keeping the work area tidy.  A bit of a compromise has been allowed for the windows, rule 1!
- all four sides completed.
On Saturday I hosted our local monthly N/2mm group meeting.  Other circumstance meant some regulars missed out, but some modelling was achieved and the new Farish 4F was well received.  Mrs Neb also provided some more of her outstanding baking.
-  baked delights.

Thursday, 12 February 2015

Sturminster Newton - Signal box - part 1

As mentioned in my introduction, I'm building a N gauge layout based upon the station at Sturminster Newton in Dorset, on the former Somerset and Dorset Railway.  It is built on two 2.0 x 1.2m baseboards.  Some rule 1 has been applied, the biggest being that the station is now twin track as opposed to the original having a passing loop.  Sturminster itself was a market town, and was well renowned for its livestock sales on a Monday, reputed to be the largest in England.  The railway was closed in 1966.
I started work on this layout way back in 2008, and but there was a period of research conducted prior to this, and it is still ongoing today. 

 - Station end
- Buts Pond end
I had been at a bit of an impasse as to what to do for the signal box, as it was not that common.  The intent was always to build it, but the inspiration was not, cue Christmas Eve 2014.  I was up late, bottle feeding my then 2 month old daughter, Bethany, and surfing the interwebby.  As I was clicking through the pages of Osborn’s models, I came across a laser etch wooden kit for a LSWR signal box, based that at Bideford (of James May fame).  Whilst it was not exactly the Stur box, it was close.  A bit of kit bashing and maybe ……………..

 
- From this ...... 
- To this?

After some delays, the kit arrived, with some extras, laser cut station boards. A quick inspection told me the following:
·         Incorrect windows,
·         Entrance door, vestibule and stairs on wrong side,
·         Too low, and
·         Wrong roof material to name a few.
- All the parts.
But I did say it would be a kit bash.
After realising I had the wrong plasticard with weather board detail, work finally started this evening.  The laser cut stone detail at the base was removed and I am replacing this with an extra 9 planks of weatherboard.  Added to this I have to add a window and several doors to get access to the leaverframe.  These additional doors were only discovered after a further inspection of the few photos I have.
- Front and rear sides done, and work commencing on the right hand side.