Wednesday 25 February 2015

Sturminster Newton - Landscaping and Signal Box -part 3


Well I’m back from concreting and shed building, and now the developers are hard at work over the road dropping trees, inspiring!
- tree demolition.
I started the week by tackling the front of the layout.  I’ve been pondering the final design for here since, forever!  As much as I wanted to plonk a church there, the nearest one was over 5 miles to the north. All my references said there was nothing there except for trees and open ground and this includes the RAF aerial photos in 1947.  So why fight it.
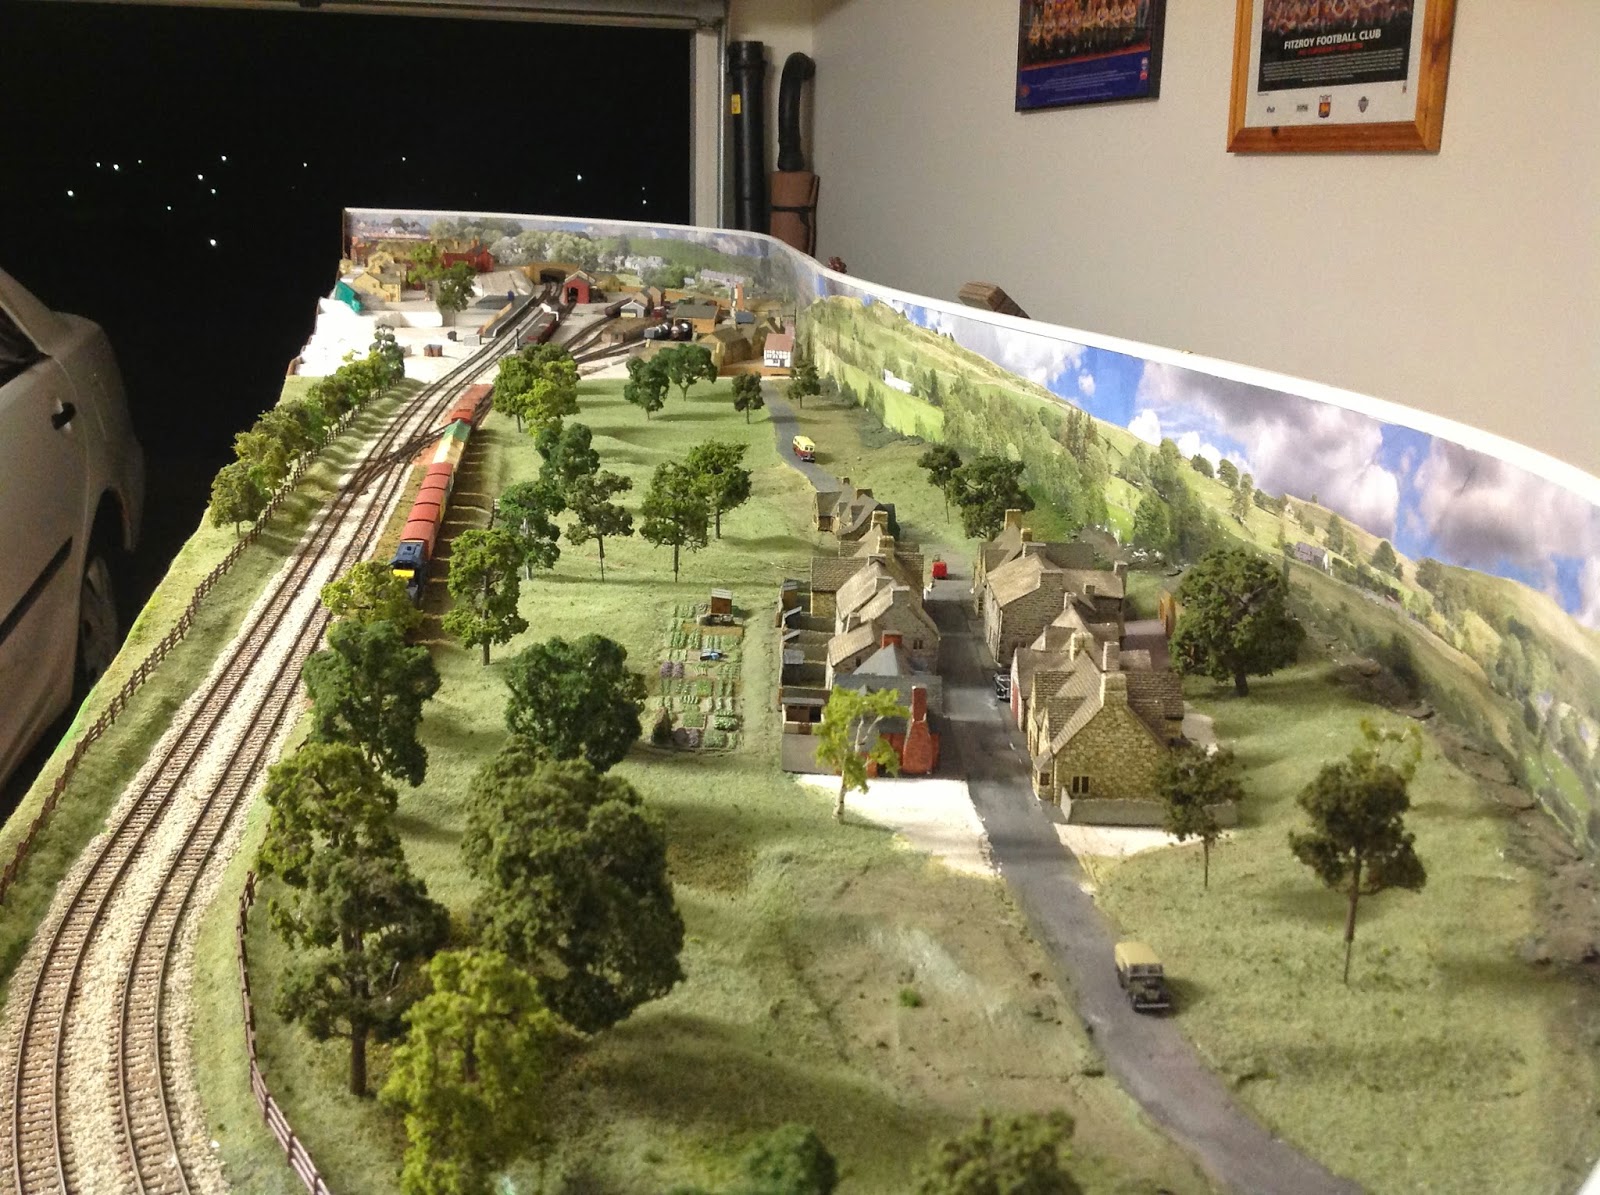
- area to the south of the station, which will be the front edge of the layout.
With a slight bending of the station road, a small portion of the Sturminster Newton village will appear in the front left-hand corner of the layout.  I will admit that I will cheat here and use some ready-to-plonk buildings; a mixture of some SD moulding plaster cast and Hornby Lyddle End.
A bit of foam shaping and it was time to apply some plaster bandage.  I started with some 6” wide bandage that Mrs Neb found at the local $2 shop.  This went on reasonably well.  Once this roll was finished, I then started a new roll of 4” bandage, which I “acquired” during one of Mrs Nebs recent hospital visits.  This stuff was great, the plaster was really smooth and spread quite easily. 
- plaster bandage drying.
 This dried within 4 hours and so I was able to put some base coat down before I attacked the area with some static grass. From here I moved onto the station road area.  I shaped some 3mm ply to fit the area, including going over the bridge and down into the goods yard entry and round the milk factory.  I’ve use ply, as I want to give some ridged support to the area, in particular using DAS clay as cobble stones from a roller I found on Shapeways.  This still needs some further testing to get it to work.
- Sturminster village in top left hand corner.
I also managed to get some more work done on the signal box.  I’ve put all 4 side together, and its almost square.  Now I working on the balcony.
- balcony components.

Monday 16 February 2015

Sturminster Newton - Signal box - part 2


Just a quick update, as I’m away for the remainder of the week doing some real building.  As mentioned earlier, some further colour photos were discovered, buried within my laptop, which showed some additional doors, which turned out to be painted green. 
- one of the few colours photos showing the access doors under the signal box. 
They don’t appear to be normal doors, just some made up of weather boards, so a fix was required.  This actually took two attempts, as after I had made the first set of doors to access the levers and cables, I inadvertently glued them to wrong piece of pasticard.  Not a major disaster, but just another lesson in keeping the work area tidy.  A bit of a compromise has been allowed for the windows, rule 1!
- all four sides completed.
On Saturday I hosted our local monthly N/2mm group meeting.  Other circumstance meant some regulars missed out, but some modelling was achieved and the new Farish 4F was well received.  Mrs Neb also provided some more of her outstanding baking.
-  baked delights.

Thursday 12 February 2015

Sturminster Newton - Signal box - part 1

As mentioned in my introduction, I'm building a N gauge layout based upon the station at Sturminster Newton in Dorset, on the former Somerset and Dorset Railway.  It is built on two 2.0 x 1.2m baseboards.  Some rule 1 has been applied, the biggest being that the station is now twin track as opposed to the original having a passing loop.  Sturminster itself was a market town, and was well renowned for its livestock sales on a Monday, reputed to be the largest in England.  The railway was closed in 1966.
I started work on this layout way back in 2008, and but there was a period of research conducted prior to this, and it is still ongoing today. 

 - Station end
- Buts Pond end
I had been at a bit of an impasse as to what to do for the signal box, as it was not that common.  The intent was always to build it, but the inspiration was not, cue Christmas Eve 2014.  I was up late, bottle feeding my then 2 month old daughter, Bethany, and surfing the interwebby.  As I was clicking through the pages of Osborn’s models, I came across a laser etch wooden kit for a LSWR signal box, based that at Bideford (of James May fame).  Whilst it was not exactly the Stur box, it was close.  A bit of kit bashing and maybe ……………..

 
- From this ...... 
- To this?

After some delays, the kit arrived, with some extras, laser cut station boards. A quick inspection told me the following:
·         Incorrect windows,
·         Entrance door, vestibule and stairs on wrong side,
·         Too low, and
·         Wrong roof material to name a few.
- All the parts.
But I did say it would be a kit bash.
After realising I had the wrong plasticard with weather board detail, work finally started this evening.  The laser cut stone detail at the base was removed and I am replacing this with an extra 9 planks of weatherboard.  Added to this I have to add a window and several doors to get access to the leaverframe.  These additional doors were only discovered after a further inspection of the few photos I have.
- Front and rear sides done, and work commencing on the right hand side.

Sunday 8 February 2015

VR T class - part 2

The weather being the way it is in SE Qld, I had to actually wait some time for a good day to start paint the 2 T's.  First they good a good vinegar wash, to remove all the surplus flux and gunk, and then a good swim in the sonic cleaner.  Whilst this was all happening, I filled in some time by starting some Spirit Design coaches.
- The beginning of a CE Van.
It wasn't until mid Jan that the weather improved (humidity dropped) enough for me to attempt getting out the airbrush.  Having not had the airbrush out for almost 12 months, an impromptu spray both was constructed and test spraying commenced.  This also included giving my 5y son his 1st airbrush lesson.  While this was going all OK, when the compressor kicked in, it scared the be-jesus out of him, and he has been hesitant to enter the garage whenever I've had the compressor on.

- 1st undercoat of the T
Once the undercoat was down, a visual inspection was made to find any glaringly obvious errors, and fill-in any holes.  The next decision was wether to used the supplied yellow stripe decal, or to spray the yellow and mask.  I chose the latter, for no other reason than I wanted to give it a try.
- Mega spray, with a T, 2 x Y's and a F.
An application of Steam Era diesel yellow was made on the sections required.  Once dry, this was then masked with a combination of Tamiya 2mm tape and Humbrol Maskol.  The results of this I was quite pleased with.
- Masking removed


Thursday 5 February 2015

VR T Class - part 1

Most Thursday nights is modelling night.   A couple of mates drop-in and we continue to make a dint in our pile UFO's (UnFinished Objects).
Not so much as a UFOS, but late last year I purchased 2 x Victorian Railways T class diesels, one for me and one for Sithlord, and he in return is building me a Y class.  Both kits are made by Spirit Design.

They are brass etch kits designed to fit on an Atlas VO1000 mech.  The instructions are quite detailed and very easy to understand, just remember to read twice, solder once!  Work commenced on 10 Nov 14.  At first I attempted to make the hood steps by eye, but considering there are 16 in total, I wasn't getting any consistency.  A handrail jig was required, and fortunately SD has there own.
1st attempt at footsteps
The 1st loco was almost ready after only a few days

After some delays (wife coming home with our baby daughter, end of kinder, Christmas prep, etc), I finally got round to finishing the 2nd body.  I used some lessons learnt from the 1st body for the 2nd.  This included the following:
  • adding the long hood hand rails last (to prevent bending),
  • allowing overhang on the body mounted handrails when soldering
  • keeping better track of components.
I still only consider myself a intermediate level modeller, and my soldering skills modest, but I was happy with the results so far.


Introduction

Welcome to first of my modelling posts.  There is no guarantee that they will be regular or consistent, either be it from family or work commitments or just pure lack of modelling mojo.

My previous modelling blogging stuff can be found here - RMWeb   

So what do I model.  My primary interest is model trains, British N Gauge (1/148 scale).  I am in the process of building a layout base on Sturminster Newton railway station, in Dorset, on the old Somerset and Dorset Joint Railway.  Of late I've also been dabbling in Australian N scale (1/160).  From time to time you will also some see some aircraft appearing.

 LMS 40T Testrol wagons, with 11' propellers for HMAS Shropshire.
Spirit Design VR T class diesel, in early stages of building.